Overview
DFI Outbound is a self-service way to bring Resilinc supply chain data straight into your own Databricks environment through Databricks Delta Sharing. Instead of arranging custom integrations or exchanging files and waiting for them to arrive, you configure the share yourself in Resilinc and the data flows to your Databricks catalog. In this setup Resilinc sends the data and your organization receives it. Today the feature delivers Autonomously Mapped and Validated (AM/VM) data - the full enriched supplier network.
Once set up, you get a single place in Resilinc to see each share's status, its data volume, and when it last refreshed, and you can rename or shut down a share whenever you need to. Because the data lands directly in a shared Databricks catalog, your teams can plug it into their existing analytics, reporting, and downstream workflows without manual exports.
Before You Begin
A few things need to be in place before you can use DFI Outbound:
- The feature must be turned on for your organization. Reach out to your Digital Engagement Manager (DEM) to request it, then have the activation submitted through Resilinc Technical Support, just like any other product enablement.
- Your access level determines what you can do: View Only lets you see the DFI Outbound Registry, while Collaborate lets you both view and manage extractions.
- You also need the appropriate Autonomous Mapping product entitlement.
Where to Find It
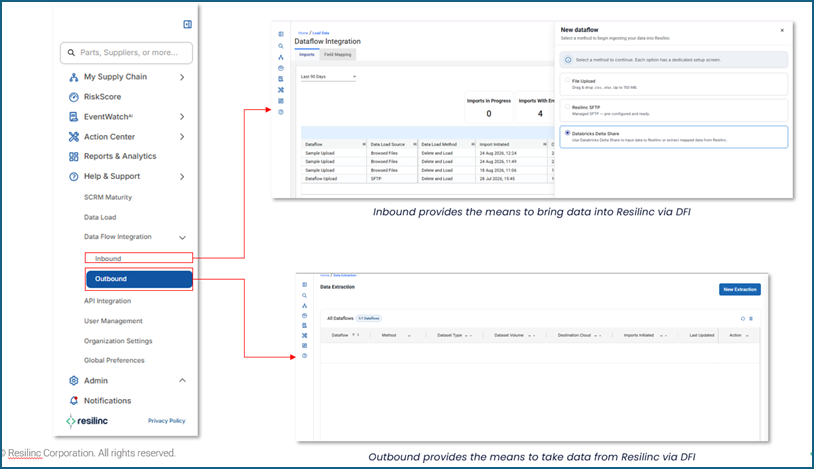
Open Data Flow Integration from the left menu. Within it, Inbound is for bringing data into Resilinc and Outbound is for taking data out. Choose Outbound to open the Data Extraction page.
Part 1: Set Up an Extraction (Self-Serve)
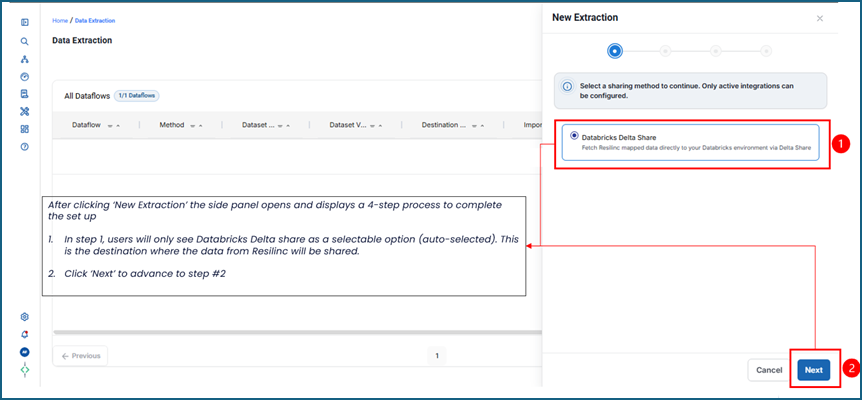
On the Data Extraction page, click New Extraction. A side panel opens with a 4-step process.
Step 1 - Choose the sharing method. Databricks Delta Share is shown and auto-selected. Click Next.
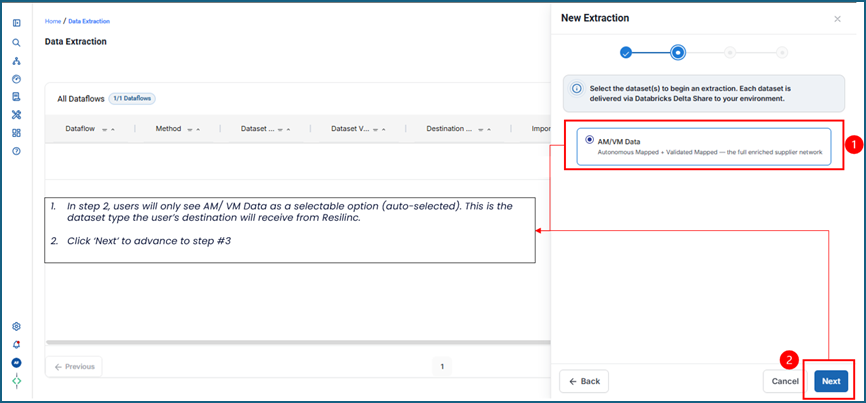
Step 2 - Choose the dataset. AM/VM Data (Autonomous Mapped + Validated Mapped - the full enriched supplier network) is shown and auto-selected. Click Next.
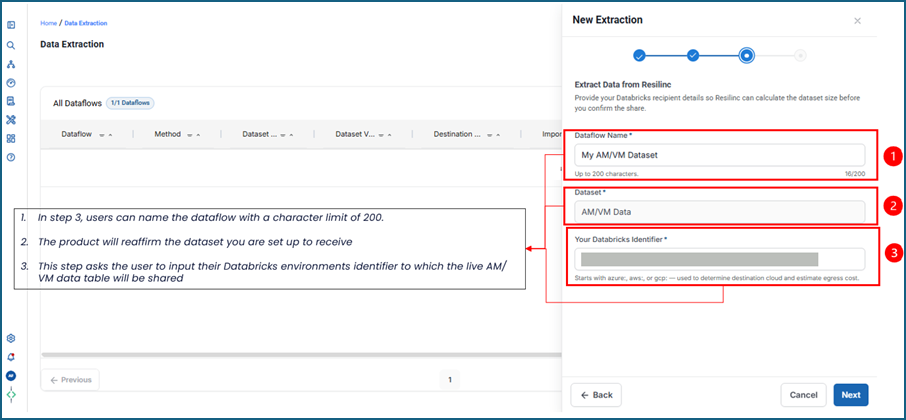
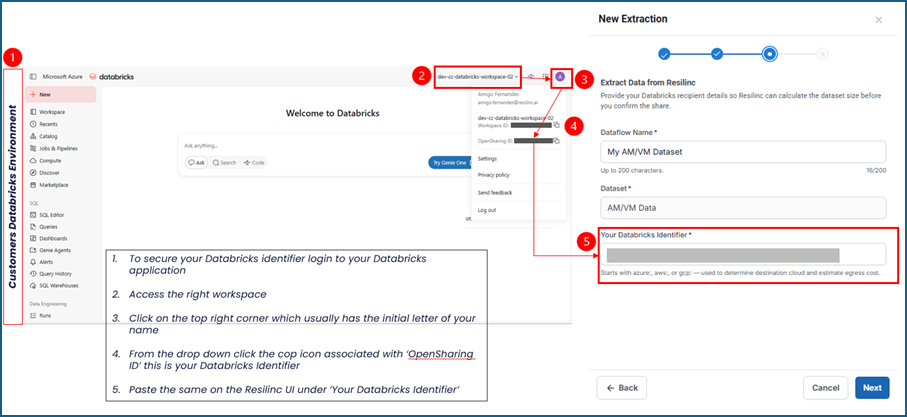
Step 3 - Enter your details. Provide a Dataflow Name (up to 200 characters). The Dataset is pre-filled. Enter Your Databricks Identifier - this determines your destination cloud and estimates egress cost.
How to find your Databricks Identifier: Log in to Databricks, open the correct workspace, click your profile initial in the top-right corner, and copy the value next to OpenSharing ID. Paste it into "Your Databricks Identifier." It starts with azure:, aws:, or gcp:.
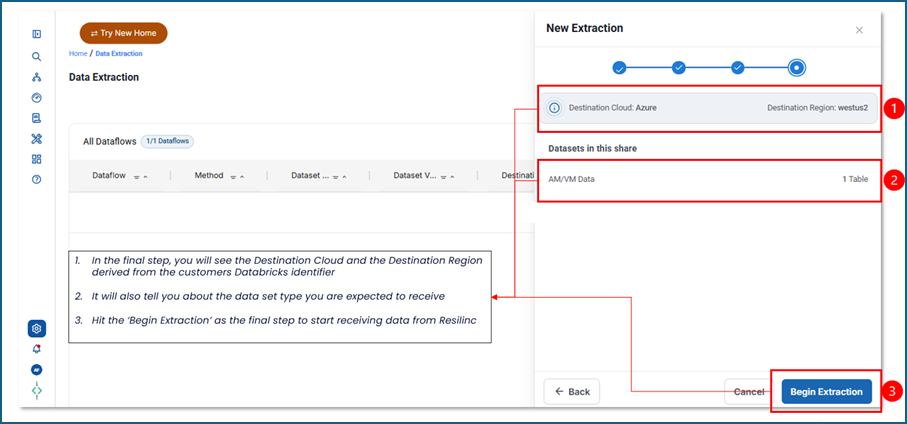
Step 4 - Review and begin. The panel shows the Destination Cloud and Destination Region (derived from your identifier) and the dataset you'll receive. Click Begin Extraction to start receiving data.
Part 2: The Data Extraction Registry
Each extraction appears as a row in the registry. The columns are:
- Dataflow Name - the name of the dataflow as configured during setup.
- Method - the sharing method chosen during setup (Databricks Delta Share).
- Dataset Type - the dataset selected to receive from Resilinc (AM/VM Data).
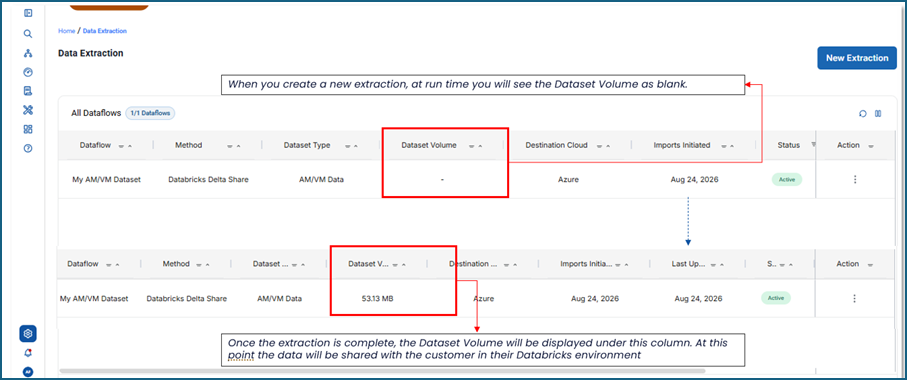
- Dataset Volume - the size of the dataset being extracted, calculated at run time. It appears blank ("-") when an extraction is first created and shows the size (for example, 53.13 MB) once the extraction completes - at which point the data is shared to your Databricks environment.
- Destination Cloud - the cloud where your environment exists, derived from the Databricks identifier you provided.
- Imports Initiated - the date the extraction setup was configured.
- Last Updated - the date the live shared table was last updated; this accounts for AM and VM data refreshes.
- Status - Active (a live data table is shared with you), Terminated (the live share was ended), or Pending (a Databricks identifier was provided but setup wasn't completed).
- Actions - Rename or Terminate the extraction.
Part 3: Manage a Dataflow (Rename / Terminate)
Open the Actions menu on a dataflow row:
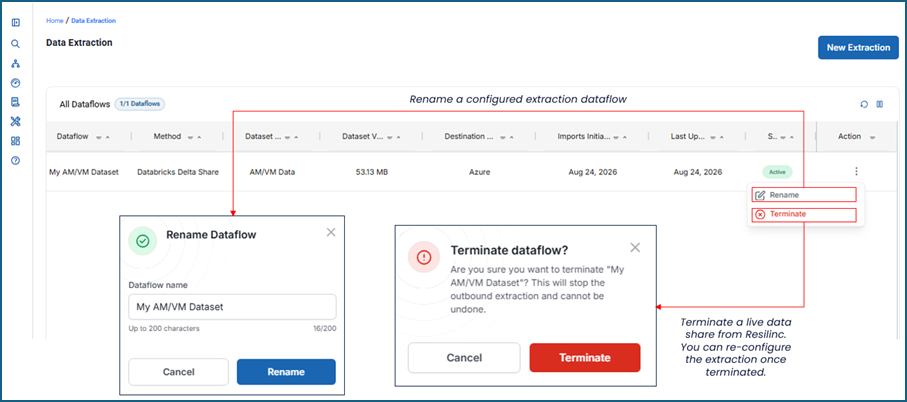
- Rename - update the dataflow's name.
- Terminate - stop a live share. This cannot be undone, but you can re-configure the extraction afterward.
Part 4: Access the Shared Data in Databricks
Once your extraction is Active, retrieve the data in Databricks:
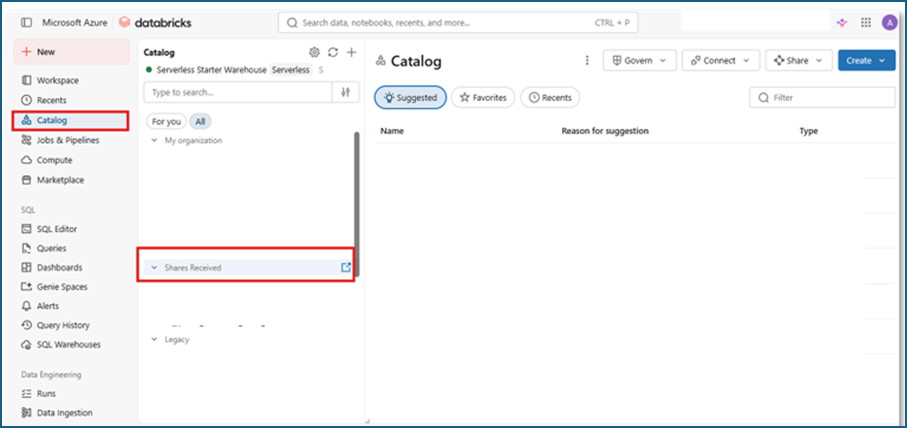
- Open Databricks → Catalog → Shares Received → click the external-link icon.
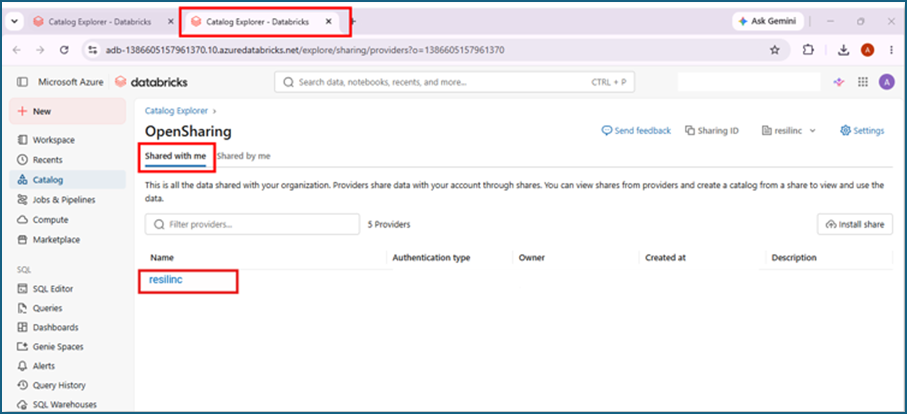
- In the new tab, open Shared with me and click the provider named resilinc.
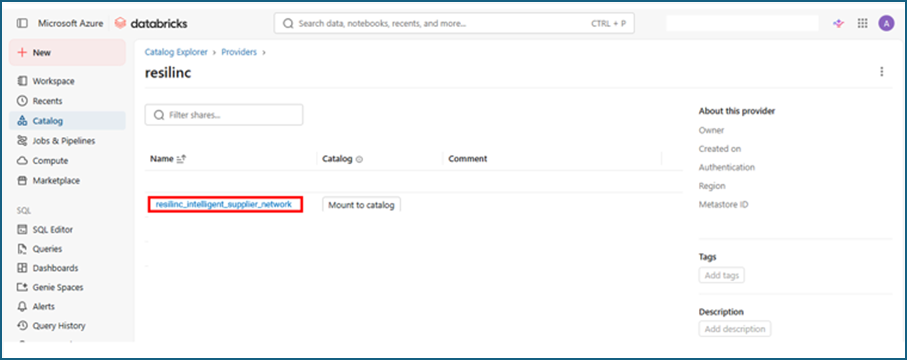
- Locate the share and click Mount to catalog.
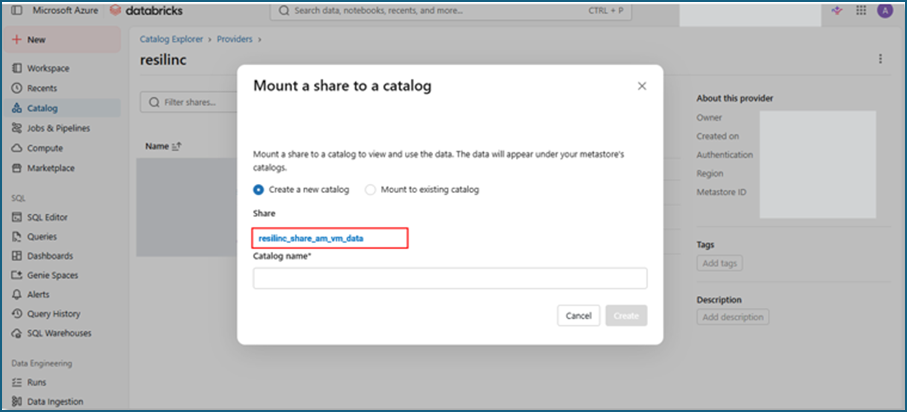
- Mount the share by creating a new catalog or using an existing one, then click Create.
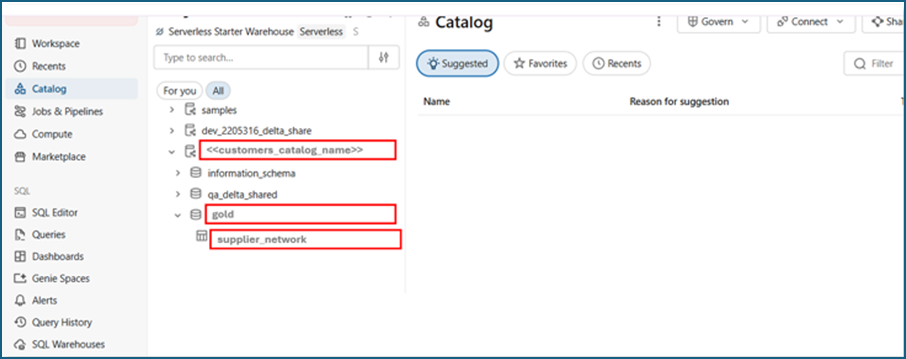
- After mounting, open your catalog → the gold schema → the supplier_network table to access the AM/VM data shared by Resilinc.
- Usage Restrictions
Data received through DFI Outbound is for your organization's own use under your agreement with Resilinc. You may not:
- Share, transfer, or otherwise make the data available to third parties, including competitors or external platforms.
- Use it to build, train, enhance, benchmark, or support competing products or services.
- Replicate, reproduce, or recreate supply chain mapping, intelligence, or related capabilities from it.
- Use it in any way that is inconsistent with the terms of your agreement with Resilinc.
Was this article helpful?
That’s Great!
Thank you for your feedback
Sorry! We couldn't be helpful
Thank you for your feedback
Feedback sent
We appreciate your effort and will try to fix the article